You can find many bicycle light types designed for different needs. Front and rear bike lights help you see the road and make sure others see you. Side and helmet lights improve your visibility from all angles. Combining active lights with passive items like reflectors or reflective clothing enhances your safety. Many countries have specific laws about which bicycle light types you must use. For example:
In New York, you need a front white bicycle light visible from 500 feet and a rear red or amber light visible from 300 feet.
California, Oregon, and Nevada each have their own regulations on how far bike lights and reflectors must be visible.
These rules and advances in technology highlight that using multiple bicycle light types can keep you safe and compliant with the law. Consider where you usually ride to select the best bicycle light types for your safety and visibility.
Key Takeaways
Use both active lights like front, rear, side, and helmet lights. Also use passive lighting like reflectors and reflective clothing. This helps you stay safe and easy to see.
Pick front bike lights that fit where you ride. Use wide beams in the city. Use narrow beams in the countryside. Use both types for mixed places.
Match the brightness to what you need. Use 200–500 lumens for city riding. Use 500–1000 lumens for country roads. Use over 1000 lumens for off-road or fast rides.
Always put your lights on tightly. Point front lights a little down. This stops you from blinding others but still lights your way.
Use flashing rear lights in the day to get noticed. At night, use steady or mixed modes. This helps others judge how far away you are.
Check your local laws about bike lights. Make sure you use the right colors and reflectors. Follow rules for how far lights must be seen.
Take care of your lights. Charge them often. Clean the lenses. Test them before you ride to make sure they work.
Use more than one light and wear reflective gear. This helps people see you from all sides. It lowers your chance of accidents in any weather.
Bicycle Light Types
When you choose bike lights, you need to know the main types and how each one helps you stay safe. You can group bicycle light types into two main categories: active lighting and passive lighting. Each type plays a special role in your visibility and safety on the road.
Active Lighting
Active lighting means you use lights that shine or flash to make you visible. These lights help you see and help others see you. Most modern bike lights use LED lights because they are bright and last a long time.
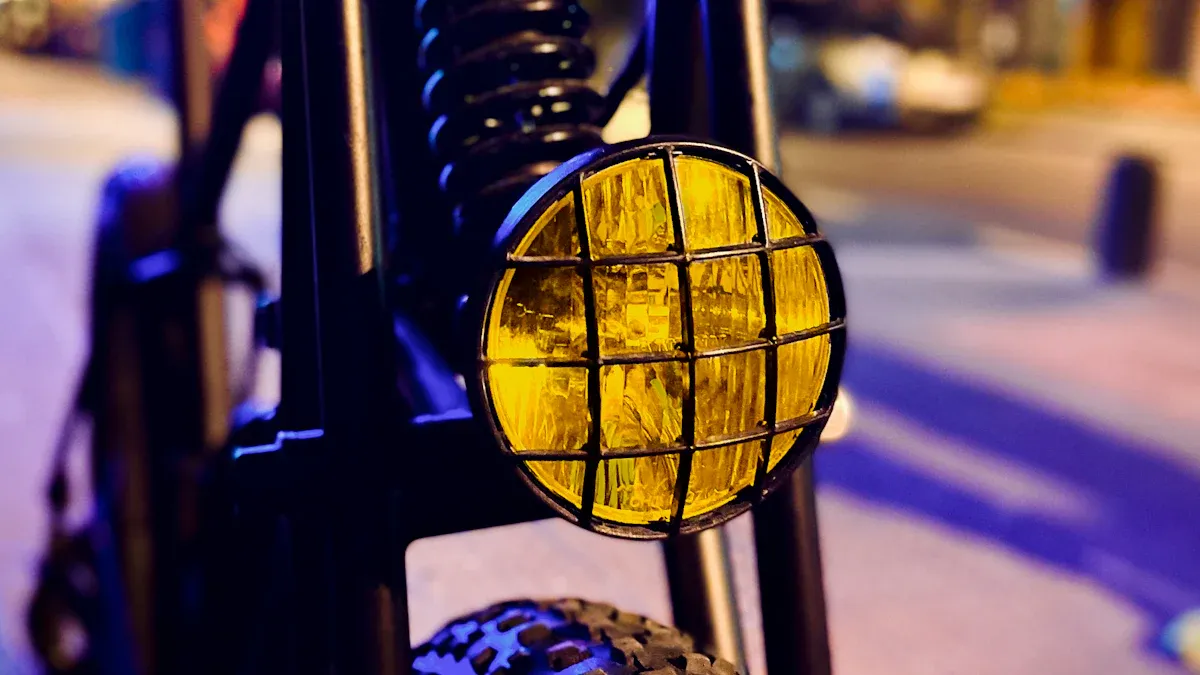
Front Bike Lights
Front bike lights help you see the road ahead and let drivers and other cyclists spot you. You mount a front light on your handlebars or helmet. You can find front bike lights with different brightness levels. Some front lights have a wide beam for city riding, while others have a narrow beam for dark country roads. You should always use a front bike light, even during the day, to increase your visibility.
Rear Lights
A rear light makes you visible from behind. You attach a rear light to your seat post, rear rack, or backpack. Most rear lights shine red, which drivers expect to see on the back of a bicycle. Some rear lights have steady beams, while others flash to grab attention. You should use a rear light at all times, especially in low-light conditions. Many rear lights now include brake-activated features that get brighter when you slow down.
Side and 360-Degree Lights
Side lights help cars and other cyclists see you from the side. You can attach these lights to your frame or wheels. Some side lights create a circle of light around your bicycle, giving you 360-degree visibility. This extra visibility can prevent accidents at intersections or when cars turn across your path.
Helmet and Wheel Lights
Helmet lights give you extra visibility because they move with your head. You can point a helmet light where you look, which helps you spot hazards. Wheel lights attach to your spokes and spin as you ride. These lights make your bicycle stand out from the side, especially at night. Both helmet and wheel lights add another layer of safety.
Passive Lighting
Passive lighting does not shine by itself. Instead, it reflects light from car headlights or street lamps. You do not need batteries for passive lighting, but it only works when another light source hits it.
Reflectors
Reflectors bounce light back toward its source. You usually find reflectors on your pedals, wheels, and the front and rear of your bicycle. Reflectors help drivers see you when their headlights shine on you. Every bicycle should have reflectors as a basic safety feature.
Reflective Clothing
Reflective clothing includes vests, jackets, ankle bands, and backpacks with special strips that reflect light. When you wear reflective clothing, you increase your visibility from all directions. You should wear reflective gear, especially if you ride at night or in low-light conditions.
Tip: Combine active and passive lighting for the best safety. Use bright bike lights and wear reflective clothing to make sure everyone can see you from every angle.
You should always use both active and passive lighting. Active lights help you stand out in the dark, while passive lighting adds extra visibility when lights shine on you. By using both, you give yourself the best chance to stay safe on your bicycle.
Front Bike Lights
Front bike lights play a key role in keeping you safe on your bicycle. You use them to see the road ahead and to make sure others notice you. Choosing the best front bike lights depends on where you ride and what you need to see.
Beam Patterns
Wide Beam
A wide beam spreads light across a broad area. This pattern works well for urban cycling because it lights up the street, sidewalks, and nearby obstacles. You avoid blinding drivers or other cyclists since the light does not focus in one spot. Many city riders choose a wide beam for their front light to stay visible in busy areas.
Narrow Beam
A narrow beam focuses light in a straight line. This pattern helps you see far ahead, which is important when you ride fast or in dark places. Rural roads and trails often have little or no street lighting. A narrow beam front light lets you spot hazards early and react in time. The best front bike lights for rural rides often use a narrow beam to give you a clear view.
Combination Beam
Some front bike lights offer a combination beam. This pattern mixes wide and narrow beams. You get a bright spot in the center and enough light on the sides. Combination beams work well if you ride in both urban and rural areas. You stay safe by seeing far ahead and also spotting things to the side.
Tip: The Supernova E3 Pro 2 uses a special beam that points most light downward. This design helps you avoid blinding others during urban cycling. The Magicshine EVO 1300 lets you switch between high and low beams, so you can adjust for city or country roads.
Brightness Levels
Urban vs. Rural
The right brightness for your front light depends on where you ride. In urban areas, streetlights help you see, so you need less brightness. A front bike light with 200–500 lumens works well for city streets. For rural roads, you need more power. Choose the best front bike lights with 500–1000 lumens or more to light up dark paths.
Riding Environment | Recommended Beam Pattern | Recommended Brightness (Lumens) |
|---|---|---|
Urban / City Riding | Wide beam | 200–500 |
Rural / Suburban Roads | Narrow beam | 500–1000 |
Trail / Mountain Biking | Combination or narrow | 1000–2000+ |
You may need a brighter front light if you ride fast or in bad weather. For speeds over 15 mph, pick a front bike light with at least 700 lumens. In fog or rain, 500 lumens or more helps you stay safe.
Daytime Running
Using a front light during the day makes you stand out. Many of the best front bike lights have a daytime mode. This mode uses a steady or flashing beam to catch the eye of drivers and other cyclists. You increase your safety by using your front bike lights even when the sun is out.
Mounting Options
You can mount your front bike lights in several ways. Most riders attach the front light to the handlebars. This spot gives you a clear path of light and keeps the beam steady. Some of the best front bike lights also fit on your helmet. A helmet-mounted front light moves with your head, so you can point it where you look. For extra safety, use both handlebar and helmet lights. Make sure you aim your front light slightly downward. This angle lights up the road without shining into the eyes of others.
Always check that your front bike lights stay secure and point in the right direction before each ride. A loose or poorly aimed front light can reduce your visibility and safety.
Rear and Side Bike Lights
Rear and side bike lights help you stay safe by making you visible from every direction. You need these lights to alert drivers and other road users to your presence, especially when you ride your bicycle in low-light or busy traffic conditions. Good visibility from the back and sides can prevent many accidents.
Rear Lights
A rear light lets people behind you see your bicycle. You attach a rear light to your seat post, rear rack, or even your backpack. Most rear lights shine red, which signals to drivers that you are ahead of them. You should always use a rear light, even during the day, to boost your visibility.
Steady vs. Flashing
You can choose between a steady rear light and a flashing rear light. A steady rear light gives a constant red glow. This type helps drivers judge your distance and speed. A flashing rear light blinks on and off. This pattern grabs attention quickly, especially in busy streets or at night. Many cyclists use both modes for extra safety. Some rear lights let you switch between steady and flashing, so you can pick the best option for your ride.
Tip: Use a flashing rear light in the daytime to stand out in traffic. At night, combine steady and flashing modes for maximum visibility.
Brake-Activated
Brake-activated rear lights add another layer of safety. These lights get brighter or flash when you slow down or stop. Drivers behind you can react faster when they see your rear light change. Some modern bicycle lights use sensors to detect braking, so you do not need to press any buttons.
Side Lights
Side lights help cars and other cyclists see you from the left and right. You can mount these lights on your bicycle frame or wheels. Side lights play a big role in keeping you safe at intersections and when cars turn across your path.
Spoke and Frame Lights
Spoke lights attach to your wheel spokes and create bright patterns as you ride. Frame lights mount on the sides of your bicycle. Both types make you more visible from the side, especially in the dark. You can use spoke lights in different colors to make your bicycle stand out.
360-Degree Visibility
You need 360-degree visibility to stay safe in traffic. This means people can see you from the front, back, and both sides. Using a rear light, side lights, and front light together gives you full coverage. Reflective gear and spoke lights also help you achieve this goal.
Light Type | Where to Mount | Main Benefit |
|---|---|---|
Rear Light | Seat post, rack, bag | Visible from behind |
Side Light | Frame, wheels, spokes | Visible from the sides |
Brake-Activated | Rear (with sensor) | Alerts when slowing down |
Remember: The more visible you are, the safer you stay on your bicycle. Always check your lights before each ride.
Choosing a Bicycle Light
Brightness and Lumens
When you pick a bicycle light, brightness matters most. You measure brightness in lumens. A higher lumen number means a brighter light output. Not every ride needs the same amount of light. Your riding environment changes what you need.
In urban areas, streetlights help you see. You can use a front light with 200–500 lumens. This level keeps you visible without blinding others.
On rural roads, you face darkness. You need a brighter bicycle light. Choose a front light with 500–1000 lumens or more.
For off-road or mountain biking, you want the best bike lights with 1000–2000 lumens. Trails have no extra lighting, so you need to see every obstacle.
Here is a quick lumens guide for different situations:
Riding Scenario | Recommended Lumens (Front) | Recommended Lumens (Rear) |
|---|---|---|
Urban Commuting | 200–500 | 20–50 |
Rural Roads | 500–1000 | 50–100 |
Off-Road/Trails | 1000–2000 | 50–100 |
Daytime Visibility | 400+ (flashing mode) | 50+ (flashing mode) |
Tip: Always check the recommended lumens for your area. Too much light in urban settings can blind drivers. Too little light in rural areas can put you at risk.
You should also think about how fast you ride. If you go faster than 15 mph, you need a brighter bicycle light to see hazards in time. Use this buyer’s guide to match your light output to your riding style.
Battery and Power
The battery type affects how long your bike lights last and how easy they are to recharge. Most modern bicycle lights use USB rechargeable lights. These lights let you charge with a phone charger or power bank. You save money and avoid waste from disposable batteries.
USB rechargeable lights work well for daily riders. You can charge them at home, work, or school.
Some bicycle lights use AA or AAA batteries. These work if you ride far from power sources, but you must carry spares.
High-powered lights for off-road or long rural rides often have bigger batteries. Check the run time before you buy.
Always look at the battery life listed by the maker. A light that runs out halfway through your ride will not keep you safe. For urban commutes, a light with 2–4 hours of run time works well. For longer rides, pick a bicycle light with 6 hours or more.
Note: Cold weather can drain batteries faster. Charge your lights before every ride, and carry a backup if you plan to be out late.
Mounting and Placement
How you mount your bicycle light changes how well others see you. You want your bike lights to stay secure and point in the right direction.
Handlebar mounts work best for front lights. They give a steady beam and keep your hands free.
Seat post or rear rack mounts hold rear lights. Place the light where cars can see it from behind.
Some lights attach to your helmet. Helmet lights move with your head, so you can point them at hazards.
Wheel and spoke lights add side visibility. These help in urban traffic and at intersections.
Check that your mounts fit your bicycle. Some mounts use rubber straps, while others use clips or bolts. Test the placement before you ride. Aim your front light slightly down to avoid blinding others. Make sure your rear light faces straight back.
Tip: Use more than one light for the best coverage. Combine a handlebar light with a helmet light, or add spoke lights for 360-degree visibility.
Choosing the right mounting and placement helps you get the most from your bicycle light. You stay safer when your lights stay secure and visible.
Weather Resistance
You need bike lights that work in all weather. Rain, fog, and snow can make it hard for others to see you. Wet weather can also damage your lights if they are not built to handle it. When you choose a bicycle light, always check its weather resistance.
Most bike lights have an IP (Ingress Protection) rating. This rating tells you how well the light keeps out water and dust. You can find the IP rating on the packaging or in the product details.
IP Rating | What It Means | Example Use Case |
|---|---|---|
IPX4 | Splash resistant | Light rain, wet roads |
IPX5 | Water jets resistant | Heavy rain, puddles |
IPX6 | Strong water jets resistant | Storms, washing bike |
IPX7 | Submersible up to 1 meter | Accidental drops in water |
Tip: For daily commuting, pick a light with at least IPX4. If you ride in heavy rain or off-road, choose IPX5 or higher.
You should also look for lights with sealed charging ports and rubber covers. These features keep water out and protect the battery. Some lights have a one-piece design with no seams. This design gives extra protection against leaks.
Cold weather can affect battery life. Low temperatures drain batteries faster. Charge your lights before you ride in winter. Carry a backup light if you plan to be out for a long time.
If you ride in fog, pick a light with a wide beam and a flashing mode. This setup helps you stand out when visibility drops. Bright colors and reflective gear also help in bad weather.
Note: Always dry your lights after riding in the rain. Store them indoors to prevent rust and damage.
Legal Requirements
You must follow the law when you use bike lights. Each state or country has its own rules. These laws help keep you and others safe on the road.
Most places require a white front light and a red rear light. The lights must be visible from a certain distance. Some areas also require reflectors on your pedals, wheels, or clothing.
Here are some common legal requirements in the United States:
Front Light: White, visible from at least 500 feet.
Rear Light: Red, visible from at least 300 feet.
Reflectors: Often required on pedals and wheels.
Side Visibility: Some states require side reflectors or lights.
State | Front Light | Rear Light | Reflectors Required |
|---|---|---|---|
California | 300 ft | 500 ft | Yes |
New York | 500 ft | 300 ft | Yes |
Oregon | 500 ft | 600 ft | Yes |
Alert: Laws change often. Always check your local rules before you ride at night.
If you ride in other countries, the rules may differ. Some places require daytime running lights. Others set limits on how bright your lights can be.
You should mount your lights at the correct height. Make sure nothing blocks the beam. Test your lights before each ride to stay legal and safe.
Tip: Carry a spare set of lights or batteries. If your main light fails, you can still follow the law and stay visible.
Choosing lights that meet legal standards protects you from fines. More importantly, it keeps you safe every time you ride.
Bike Lights for Different Scenarios
Commuting
When you ride your bicycle for commuting, you need to focus on being seen by drivers and other road users. You want bike lights that make you stand out in traffic, especially during early mornings or evenings. A front light with 200–500 lumens works well for city streets. This brightness helps you stay visible without blinding others. You should use a rear light with at least 20–50 lumens. Many commuters choose a flashing mode for their rear light to catch attention.
Mount your front light on your handlebars and your rear light on your seat post or backpack. Some bike lights offer side lighting, which helps drivers see you at intersections. Using both front and rear lights during the day can lower your risk of accidents. Studies show that cyclists who use lights in the daytime are less likely to be involved in crashes. You can also add reflective gear or spoke lights for extra visibility.
Tip: Always check your lights before leaving for work or school. A quick test can keep you safe on busy roads.
Road Cycling
Road cycling often means riding at higher speeds and sometimes in low-light conditions. You need a front light that lets you see far ahead. Choose a front light with 500–1000 lumens for open roads. This brightness helps you spot hazards early. Use a rear light with at least 50 lumens. A steady rear light helps drivers judge your distance, while a flashing mode grabs attention.
Mount your front light on your handlebars for a steady beam. Place your rear light on your seat post or rear rack. Some cyclists use two rear lights—one steady and one flashing—for extra safety. You can also add a helmet light to point where you look. This setup gives you better control and visibility.
A table can help you compare light setups:
Scenario | Front Light (Lumens) | Rear Light (Lumens) | Extra Features |
|---|---|---|---|
Commuting | 200–500 | 20–50 | Side lights, reflectors |
Road Cycling | 500–1000 | 50+ | Helmet light, dual rear |
Mountain Biking
Mountain biking takes you off the road and into dark, twisty trails. You need much brighter bike lights to see every bump and turn. Experts recommend a handlebar front light with 1500–2000 lumens. This light gives you a wide, powerful beam. Add a helmet-mounted front light with about 1000 lumens. The helmet light moves with your head, so you can see where you look.
Use a rear light with at least 50 lumens. Pick a model with a secure clamp mount, because rough trails can shake loose weaker mounts. Battery life matters on long rides. Choose lights that last for several hours and carry a backup if you plan to ride late.
You should always use both a front light and a rear light. Many mountain bikers add side lights or spoke lights for 360-degree visibility. Advanced lighting systems, like smart bike lights, can adjust brightness and flash patterns when you approach intersections or tricky spots. This technology helps drivers and other riders see you from all angles.
Using multiple lights—front, rear, and side—keeps you safer in every scenario. You increase your visibility and lower your risk of accidents, whether you ride in the city or on the trail.
Night and Day Riding
You need to think about your visibility every time you ride, whether it is day or night. Many people believe bike lights are only for nighttime, but you also need them during the day. Using the right bike lights in both situations helps you stay safe and visible to everyone on the road.
Night Riding
At night, you face the biggest risks because drivers may not see you. You need a front light with at least 500 lumens to light up the road ahead. A narrow or combination beam works best for dark streets or trails. You should also use a rear light with at least 50 lumens. Flashing rear lights grab attention, but a steady mode helps drivers judge your distance.
Mount your front light on your handlebars and your rear light on your seat post or backpack. Add side lights or spoke lights for extra visibility at intersections. Many riders use a helmet light to spot hazards where they look. Always check your lights before you leave. Make sure they are charged and aimed correctly.
Tip: Use more than one light for night riding. Combine a handlebar light, helmet light, and rear light for 360-degree visibility.
Day Riding
Daytime riding may seem safer, but you still need bike lights. Bright sunlight, shadows, and busy streets can make you hard to see. A front light with at least 400 lumens in flashing mode helps you stand out. Use a rear light with a flashing pattern to catch the eye of drivers. Many modern bike lights have a special daytime mode that uses extra-bright flashes.
You should always keep your lights on, even when the sun is shining. Studies show that cyclists who use lights during the day have fewer accidents. Mount your lights in the same way as you do at night. Check that nothing blocks the beam.
Time of Day | Front Light (Lumens) | Rear Light (Lumens) | Recommended Mode |
|---|---|---|---|
Night | 500+ | 50+ | Steady or flashing |
Day | 400+ (flashing) | 50+ (flashing) | Flashing |
Note: Always carry a backup light or extra batteries. If your main light fails, you stay visible and safe.
Using bike lights day and night gives you the best chance to avoid accidents. You help drivers, pedestrians, and other cyclists see you at all times.
Safety and Visibility Tips
Light Positioning
You can improve your safety by placing your bike lights in the right spots. Always mount your front light on the handlebars or helmet. Aim the beam slightly downward so you light up the road without blinding others. Place your rear light on the seat post or rear rack. Make sure it points straight back for the best visibility. If you use side lights, attach them to your wheels or frame. This setup helps drivers see you from every angle.
Check your lights before each ride. Make sure nothing blocks the beam. Clean your lights often to remove dirt or water spots. Good positioning gives you better visibility and helps you avoid accidents.
Tip: Test your lights in a dark area. Walk around your bike to see how visible you are from the front, back, and sides.
Using Multiple Lights
Using more than one light increases your safety. You can combine a handlebar light with a helmet light. This combination lets you see the road and spot hazards where you look. Add a rear light and side lights for full coverage. Many riders use both steady and flashing modes. Steady lights help others judge your speed. Flashing lights grab attention in busy areas.
A good safety setup includes at least one front light, one rear light, and side lights or reflectors. This approach gives you 360-degree visibility. You stand out in traffic and at intersections. Maximizing visibility keeps you safer, especially in low-light conditions.
Light Type | Placement | Benefit |
|---|---|---|
Front Light | Handlebar/Helmet | See ahead, be seen |
Rear Light | Seat post/Rack | Seen from behind |
Side Light | Wheels/Frame | Seen from the sides |
Maintenance
You need to keep your bike lights in good shape for safety. Charge your lights before every ride. Replace batteries if needed. Check for cracks or loose mounts. Clean the lenses with a soft cloth. Dirt or scratches can lower your visibility.
Store your lights indoors when not in use. Water and cold weather can damage batteries. Test all your lights once a week. If a light stops working, fix or replace it right away. Good maintenance means your lights work when you need them most.
Note: Reliable lights are key to your safety. Make maintenance part of your routine.
Passive Lighting Use
Passive lighting helps you be seen on your bike without batteries. It works by using materials that reflect light from cars or street lamps. These materials send the light back to drivers. This makes you easier to see at night.
You can use passive lighting in a few ways:
Reflectors: These are small plastic parts you put on your bike’s wheels, pedals, front, and back. When car headlights shine on them, they glow brightly. Always check your reflectors to make sure they are clean and not broken. Dirty or cracked reflectors do not shine well.
Reflective Tape: You can stick this tape on your bike frame, helmet, or backpack. The tape adds extra shine from all sides. You can cut it to fit any spot or shape you want.
Reflective Clothing and Accessories: Jackets, vests, ankle bands, and backpacks often have shiny strips. Wearing these makes your whole body easier to see. Moving things like your ankles catch drivers’ eyes because they move and stand out.
Tip: Try wearing reflective ankle bands or shoe covers. Drivers notice moving reflections faster than ones that do not move.
You should always use passive lighting with active lights. Passive lighting only works when another light, like car headlights, shines on you. In total darkness, passive lighting alone will not keep you safe. Active lights, like front and rear bike lights, help you stay visible all the time.
Here is a quick guide for passive lighting:
Passive Lighting Type | Where to Use It | Benefit |
|---|---|---|
Reflectors | Wheels, pedals, frame | Visible from all directions |
Reflective tape/stickers | Frame, helmet, bags | Customizable extra visibility |
Reflective clothing/gear | Body, backpack, shoes | Makes you stand out in motion |
Check your passive lighting before every ride. Make sure nothing covers your reflectors or shiny strips. Wipe them with a damp cloth if they look dirty. Replace old tape or broken reflectors as soon as you can.
Note: Some states say you must have certain reflectors by law. Check your local rules to stay safe and legal.
Using both passive and active lighting gives you the best chance to be seen. You help drivers notice you from farther away, which can stop accidents. Stay visible, stay safe, and enjoy your ride with confidence.
Comparison and Checklist
Light Type Comparison
You can find many types of bicycle lights, but they fall into two main groups: lights that help you see and lights that help others see you. Each type has special features that fit different riding needs.
Feature | “To See” Lights | “To Be Seen” Lights |
|---|---|---|
Purpose | Light up the road or trail ahead | Make you visible to others |
Brightness (Lumens) | High (600–2000+) | Low to moderate (20–200) |
Beam Angle | Narrow, focused | Wide, spreads to sides |
Battery Size | Large, longer run time | Small, lighter |
Mounting | Handlebar, helmet | Seat post, frame, wheels |
Best For | Road, mountain biking | Commuting, city riding |
Price Range | $50–$250+ | $10–$100 |
You use “to see” lights when you ride in dark places or at high speeds. These lights have a narrow beam and high lumens. They help you spot hazards far ahead. “To be seen” lights work best in cities or busy areas. They use a wide beam and lower lumens. These lights make you stand out from all directions.
Beam angle and brightness matter most. A narrow beam helps you see far, while a wide beam helps others see you from the side. Battery life changes with brightness and mode. Flashing modes save power and grab attention. Steady modes help others judge your speed and distance.
Mounting also matters. You need secure mounts for rough trails or long rides. Some lights fit on your helmet, while others go on your bike frame or wheels. Price often matches features. Basic lights cost less, but high-end models offer more power and extra functions.
Tip: Think about your main riding style. Road riders need strong, focused lights. Commuters need lights that shine in all directions.
Quick Selection Checklist
You can use this checklist to pick the right bicycle lights for your needs:
Set your budget. Decide how much you want to spend. Prices range from $10 for basic lights to over $250 for advanced models.
Choose your purpose. Do you need to see the road, or do you want others to see you? Pick “to see” lights for dark roads and “to be seen” lights for city riding.
Check brightness and beam angle. Look for high lumens and a narrow beam for distance. Choose a wide beam for side visibility.
Estimate run time. Make sure the battery lasts as long as your ride. Flashing modes last longer than steady ones.
Pick a battery type. USB rechargeable lights are easy to charge. Replaceable batteries work well for long trips.
Check mounting options. Make sure the light fits your bike or helmet. Secure mounts keep your lights safe.
Think about extra features. Some lights have brake sensors, smart modes, or even video recording.
Consider looks and size. Pick a light that matches your bike and feels easy to use.
📝 Note: Always test your lights before you ride. Make sure they work and stay in place.
This checklist helps you choose lights that fit your riding style, keep you safe, and follow the law. Use it every time you shop for new bicycle lights.
Picking the right bicycle lights makes you safer when you ride. Using front, rear, and side lights together helps others see you from all sides. Always check your lights to make sure they work well. Follow your local laws about bike lights to stay safe. Keep your lights clean and working. Stay alert while riding and help keep cycling safe for everyone.
FAQ
What is the difference between lumens and watts in bike lights?
Lumens measure how bright your bike light shines. Watts show how much power the light uses. You should focus on lumens when you want to compare brightness between different lights.
How often should you charge your bike lights?
You should charge your bike lights after every ride. If you ride daily, make it a habit to check the battery level each night. Always carry a backup light for longer trips.
Can you use a flashlight as a bike light?
You can use a flashlight, but bike-specific lights work better. Bike lights mount securely and aim the beam correctly. Flashlights may fall off or point in the wrong direction.
Are flashing lights better than steady lights?
Flashing lights grab attention quickly, especially during the day. Steady lights help others judge your speed and distance. You can use both modes together for the best visibility.
Do you need bike lights during the day?
Yes, you need bike lights during the day. Bright or flashing lights help drivers see you in traffic, even in sunlight. Studies show daytime lights lower your risk of accidents.
How do you keep your bike lights safe from theft?
You can remove your lights when you park your bike. Many lights use quick-release mounts. Store your lights in your bag or pocket to prevent theft.
What should you do if your bike light stops working during a ride?
Stay calm. Move to a safe spot. Check the battery and connections. If you have a backup light, use it. If not, walk your bike or call for help.
Are there legal penalties for not using bike lights?
Yes, many places give fines if you ride without required lights. You must follow local laws to avoid tickets and stay safe. Always check your area’s rules before riding at night.